Configure Odoo with Nginx as a Reverse Proxy
Install and Configure Nginx as a Reverse Proxy for Odoo
8. To enable users to access the Odoo web interface without typing the port number, you can configure Odoo to be accessed using a sub-domain using an Nginx reverse proxy environment.
To configure Nginx as a Reverse Proxy for Odoo, first, you need to install Nginx as shown.
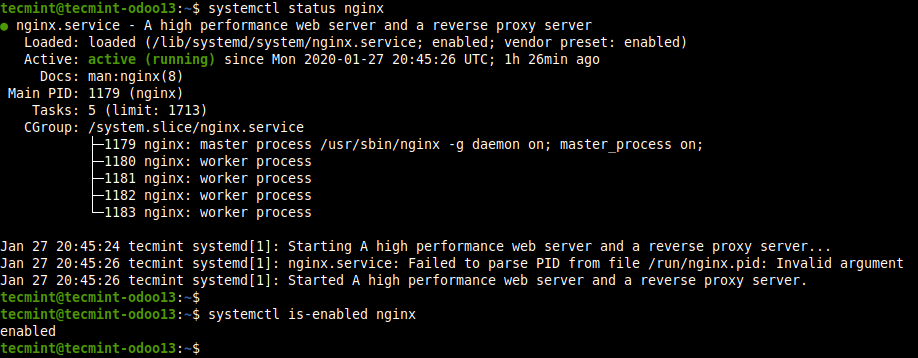
9. When the installation is complete, check if the Nginx service is up and running, is enabled as well.
10. Next, create an Nginx server block for Odoo in the file /etc/nginx/conf.d/odoo.conf as shown.
Then copy and paste the following configuration in the file. This is a simple configuration sufficient to run your Odoo system, you can add more configurations by reading the Nginx documentation to suit your environment.
11. After saving the changes in the file. Check the Nginx configuration structure for any syntax errors.

12. Now restart the Nginx service to effect the recent changes.
13. Importantly, if you have enabled the UFW firewall service enabled and running, you need to allow HTTP and HTTPS requests through the firewall to the Nginx server before starting to access the Odoo web interface.
Step 4: Accessing Odoo Web Administration Interface
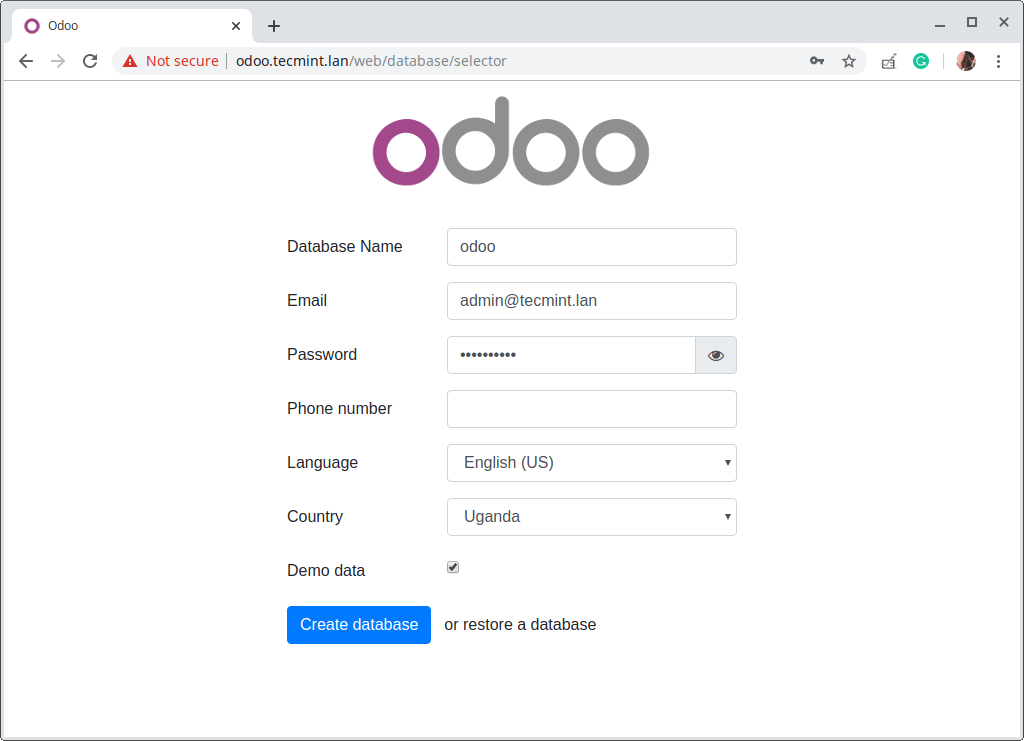
14. Next, open a web browser and use the following address to access the Odoo web administration interface.
Wait for the interface to load, once it has, you need to create a database for Odoo. Enter a database name, administrator email address, and password. Then select the language and country. You can opt to load sample data or not. Then click Create Database.
15. Then the above page will redirect to the administrator’s dashboard showing the available Odoo apps, as shown in the following screenshot. Click on the Install or Upgrade button on an app to install or upgrade it respectively. To logout, click on Admin dropdown ==> Log out.

Comments
Post a Comment